An Easy Sun-To Free Vintage Crochet Pattern.
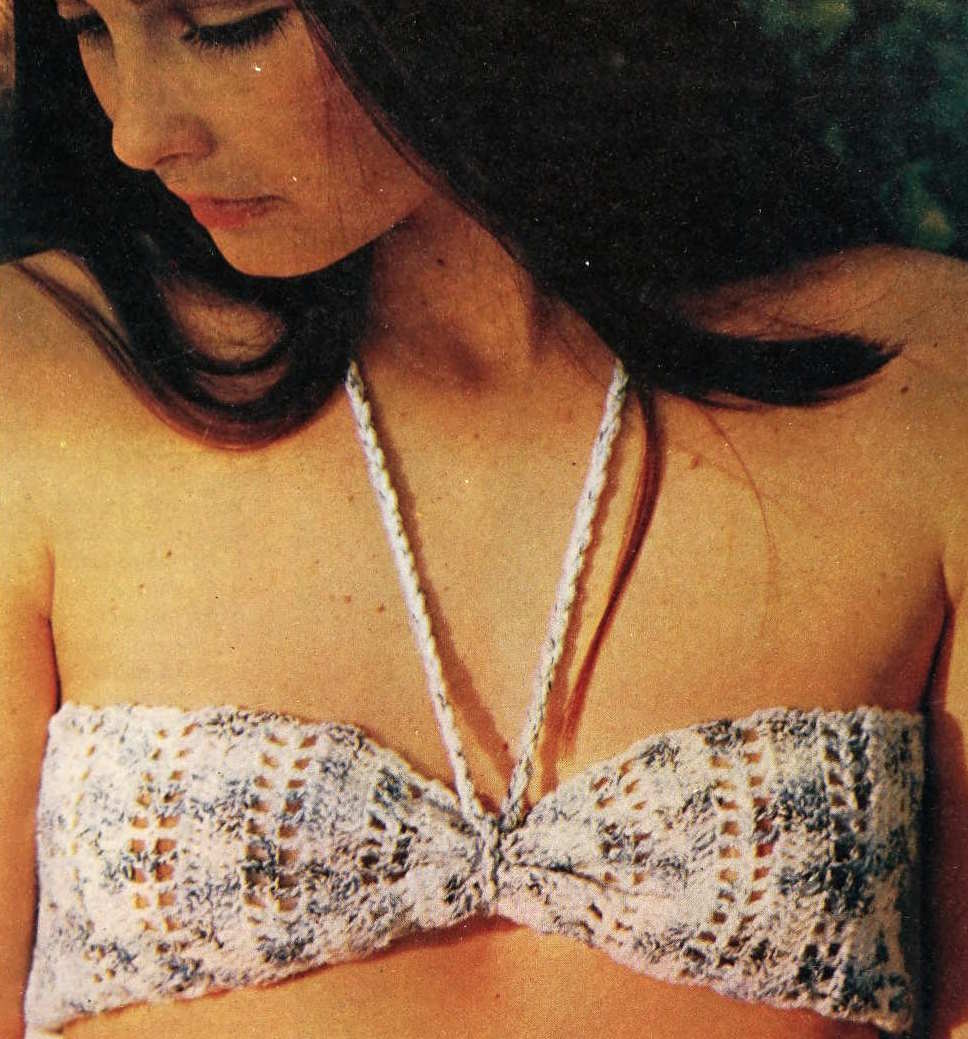
This pattern creates a simple, rectangular bandeau top (a strapless top that covers the bust). It’s worked in rows using a combination of double crochet, chain spaces, and single crochet. The top has a casing along the lower edge for elastic, and a twisted cord is used for ties.
Skill Level: Due to the vintage instructions and the need to understand the stitch pattern, this pattern is probably best suited for an intermediate crocheter.
Written Pattern
Slinky Sun-Top Crochet Pattern
Sizes:
- 32-inch bust (34-inch and 36-inch bust sizes in brackets [ ])
Gauge:
- 24 stitches and 12 rows = 4 inches in pattern stitch, using a Size C (2.75mm) crochet hook. It is recommended to make a gauge swatch
Materials:
- 2 [3] 2-oz balls of Spinnerin Wintuk Sport Print Yarn (Sport weight)
- One Size C (2.75mm) crochet hook
- 1 yard of round elastic
- 4 buttons
Abbreviations:
St = Stitch
Ch= Chain
Sl st= Slip Stitch
Sc= Single Crochet
Dc= Double Crochet
Rep= Repeat
Sk= Skip
Patt= Pattern
Sp= Space
Instructions:
Bandeau Top:
- Foundation Chain: Using Size C hook, make 50 chains for the center back edge.
- Base Row: Into the 4th chain from the hook, work 1 dc, * chain 1, skip the next chain, 1 dc into the next chain, repeat from * to end. Turn. (13 chain spaces)
- Commence Pattern:
- Row 1: Chain 1, * 1 dc into the first dc, chain 1, 1 dc into the next dc, repeat from * to end. Turn.
- Row 2: Chain 3 (counts as a dc), 1 dc into the first dc, * 1 dc into the next chain space, 1 dc into the next dc, repeat from * to end. Turn.
- Row 3: Chain 3 (counts as a dc), 1 dc into each dc to end. Turn.
- Row 4: Chain 3 (counts as a dc), 1 dc into the first dc, * chain 1, skip the next dc, 1 dc into the next dc, repeat from * to end. Turn.
- Pattern Repeat: These 4 rows form the pattern. Repeat them 20 [21:22] times more, then work rows 1 and 2 again. Do not break off the yarn.
- Lower Edging (Elastic Casing):
- Knot one end of the elastic.
- Hold the elastic along the lower edge of the top, with the knot at the center back edge.
- Continue in sc along the lower edge, working 1 stitch into each row end, and taking the yarn over the elastic to form a casing.
- Cut the elastic to the desired length (enough to comfortably fit around your torso, with a little bit of stretch), and knot the other end.
- Continue in sc up the opposite side of the foundation chain. Fasten off.
Finishing:
- Secure Knots: Sew the knots in the elastic securely.
- Pressing: Press the top lightly under a dry cloth with a cool iron.
- Buttons: Sew 4 buttons equally spaced along the last row of the top (this will be the back). The chain spaces from Row 1 can act as buttonholes.
- Twisted Cord Tie:
- Cut 6 strands of yarn, each 120 inches long.
- Make a twisted cord. (To make a twisted cord, hold all strands together at one end. Twist the strands tightly in one direction. Fold the twisted strands in half, letting the two halves twist around each other. Knot the ends.)
- Knot and trim the ends of the cord.
- Knot the cord around the center front of the top, leaving the ends for ties (around the neck).
Key Points and Clarifications:
- Chain Spaces: The pattern creates chain spaces that are used both for shaping and as buttonholes.
- Elastic Casing: The sc stitches are worked over the elastic, trapping it inside the fabric and creating a snug fit. Be sure not to crochet too tightly around the elastic, or it will be difficult to stretch.
- Twisted Cord: This adds a decorative and functional element, providing neck ties.
- The chain 3 at the begining of rows count as a stitch.